


Logmore Feature: Missions and the November Cloud Update [Updated 11/2020]
Why Have We Developed These New Features?
For many organizations, the primary target of monitoring is shipments. Since the products need to stay in top condition throughout the supply chain, shipment monitoring is the #1 most important feature for many companies when it comes to data logging.
"Missions", as we've labeled them, are Logmore's answer to this need. Since this feature was launched, it has been a massive hit and has made isolating data for specific shipments extremely simple. But we’ve decided to take it a step further, by introducing new Missions features!
New Features
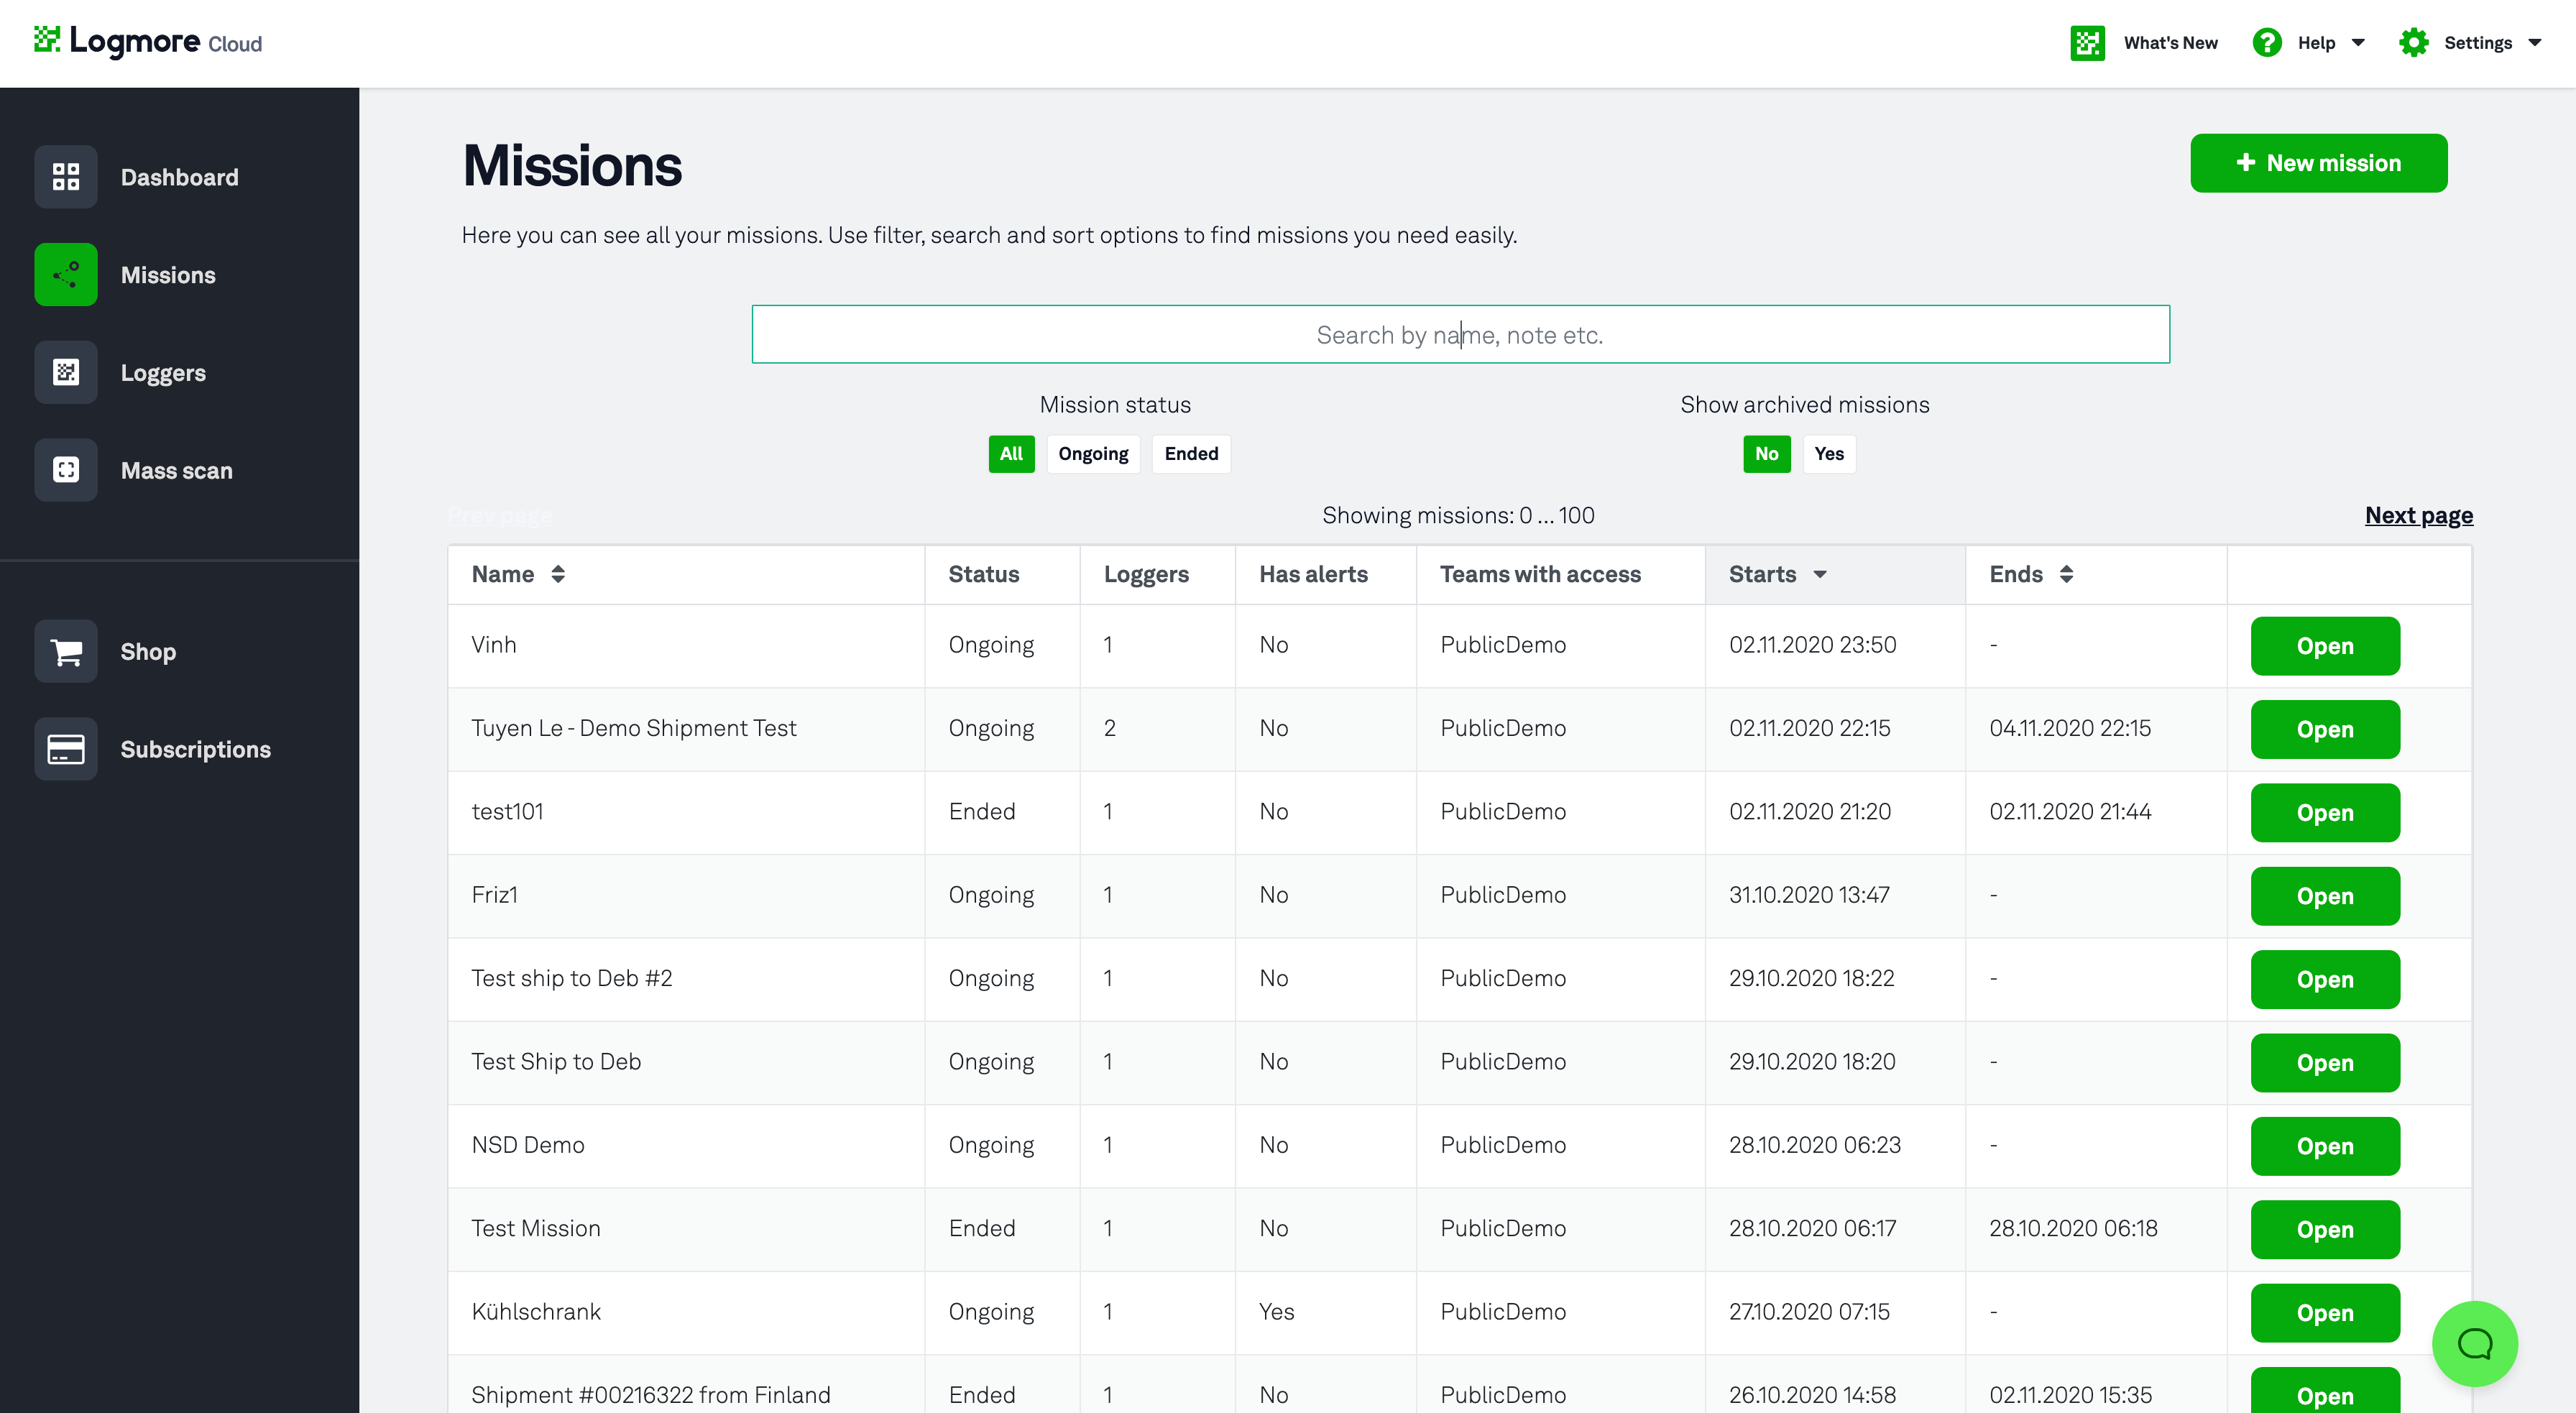
Missions are a way to manage the data collected by your loggers. You can set up a mission to gather information from specific situations, for example an order or a shipment. Missions can include information such as alerts, reports and custom notes to the end user.
To streamline the process of setting up a mission, and to make our cloud interface as easy as possible to navigate for our wonderful customers, we have made a few changes that you need to be aware of.
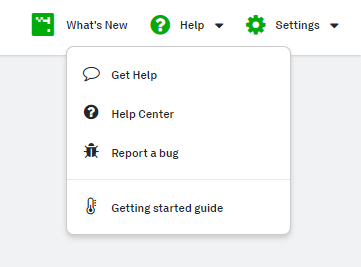
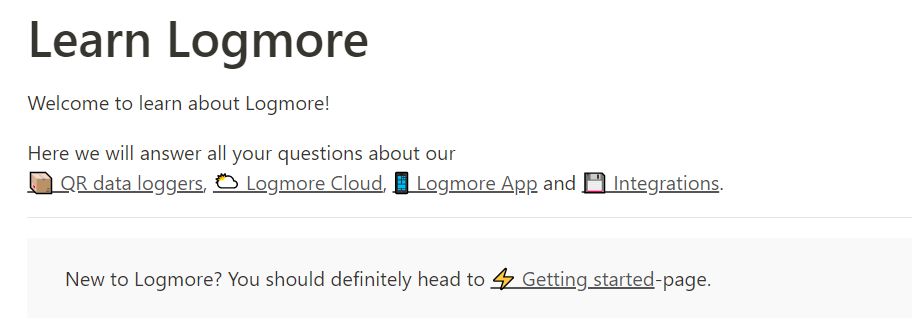
Firstly, we’ve redesigned the left hand side navigation bar. It now has fewer selections, with options such as “Help” and “Settings”, now available through a panel on the top right hand side of your dashboard. The “Help” option now provides links to our online Help Center, as well as several methods of getting in contact with us directly.
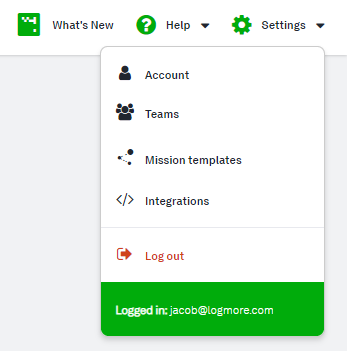
Meanwhile the “Settings” option has been divided into sections: “Account”, “Teams”, “Integrations”, and “Mission Templates”. This means you can manage your account settings, teams, users, API, and mission templates all from one place! Sounds convenient, doesn’t it?
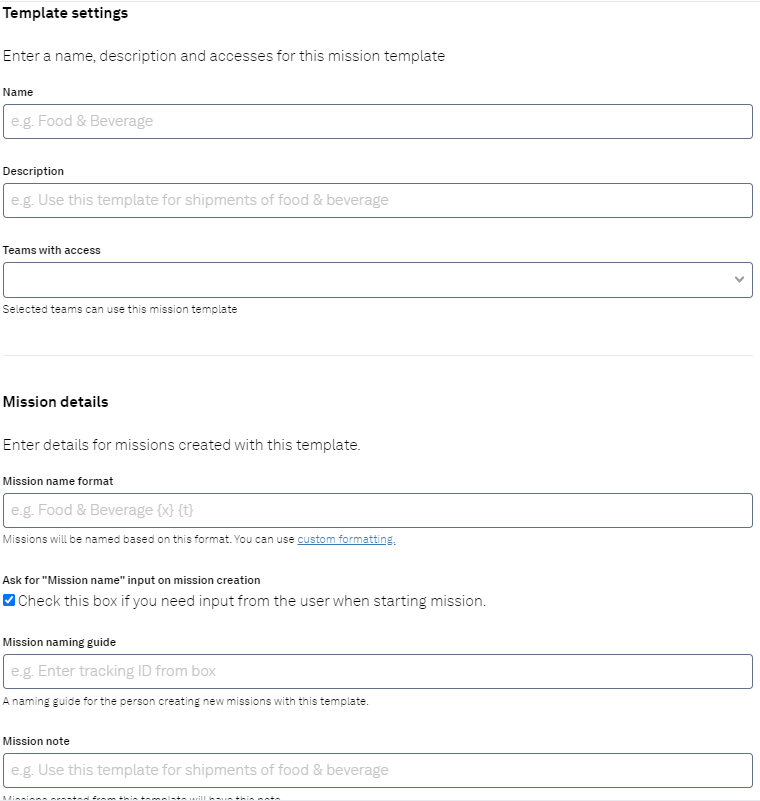
Mission Templates
So let’s talk about the Mission Templates. These can now be set up on your account without starting a mission at the same time, and have a variety of additional features such as naming formats, team access customization, options to make users add additional information when creating a mission using a template, and much more! Missions created under a template now also come with date, time, user, and incremental number stamps - thus making it much easier for you to keep track of your shipments, and also making life much more simple for your colleagues who are on the ground and setting up the missions!
We have also added a couple of new features when it comes to scanning events. Namely, user and location information. If a logger is scanned by a user who is registered in your cloud account, you will now be able to know which specific user scanned the logger! The location of the scan now also shows an address, in addition to the map coordinates. This new information can be seen from both the “Loggers” and the “Missions” views, as well as on Mission’s measurement graphs via flags.
We hope that these updates prove to be useful for you! In any case, this is not the end when it comes to releasing new features for our customers. Lots of other new and exciting developments are on the horizon, including more extensive mission automations and lots more! We look forward to updating you in the near future with our next big updates, and of course please feel free to get in touch with us if you have any feedback about these changes, or have ideas for future developments which could make your conditions monitoring even easier!
Recap: what are missions?
Said in a fancy way, missions are a way to manage the data collected by your loggers. You can set up a mission to gather information from specific situation, for example an order or a shipment. Missions can include information such as alerts, reports and custom notes to the end user.
To say the same thing in a way you'd actually want to say it, missions are shipments and shipments are missions. There is no distinction between them. When you pack a shipment, you add a logger to it to keep track of the temperature and whatever circumstances you want to monitor. If you want to be extra careful, you might pack multiple loggers all around the shipment package or container to make sure that all the different parts are in similar conditions.
As you add the loggers to the shipment, you can use Logmore Web to include them in the mission created for that shipment as well. This way you can easily keep track of which loggers are used for which shipment, and they all contribute to a singular shipment record. (Which you can access directly in Logmore Web or download.)
A mission can be set for a specific shipment or other contexts, where multiple loggers are associated with a single task at the same time. Maybe you would like to monitor certain refrigerators between shipments, or maybe you don't ship products at all.
It starts when that specific shipment begins, for example when you first send the shipment, and ends when the shipment is received at the destination.
One logger, multiple missions
As it should be, a single Logmore QR data logger can be used in multiple shipments. While the low price may make it sound even more disposable, the tag is exceptionally easy to send back to the sender thanks to it tiny size. In a company's internal use, the reusability gets to shine even brighter!
Why use the missions feature?
The better question is, why not use the missions feature? Actually, there are no reasons not to use missions to monitor shipments, or even the contents of a specific refrigerator or storeroom. As said, the main benefit of missions is how it makes all of the included loggers work together, to provide a single report with all the data collected by the loggers, where traditionally the only option has been a report per logger, and you would have needed to compile the data into one report manually.
In other words, missions minimize the time needed for data management during and after the shipping.
A single place for control
I've already managed to sell you the concept of missions, haven't I? Well, there's still more to them: they provide a way to control a large amount of tags at the same time. The obvious basic settings that come with missions are the start and ending times for them as well as the loggers used in them. The other settings include mission-specific alerts, quick-start templates and presets, and even scan page customization to suit specific needs, such as situations where the employee scanning only needs to see a thumbs up or down symbol to determine the condition the shipment is in.
We're also proud of our in-house developer team, who keep implementing new, exciting options and features all the time. Who knows how much control the missions feature will allow you in the future?
Using missions
Since there's more and more users of the Logmore users every day, and you might already be one of them, I should probably include a short guide to demonstrate how to start a mission. Here goes: creating a mission is a simple three-step (or four, if you count the optional step) procedure in Logmore Web.
- Click "New Mission"
- Enter a name for the Mission to make it easy to identify (for example, shipment number + destination)
- Select the loggers you want to include in the Mission
- (Optional:) Set custom start time for the Mission. The default is "now".
Companies with their own specific shipment IDs can enter them as the mission name or as a note in the "Mission notes" field to ensure easy identification. As usual, that means time saved on efficient data management.
Tip: Retroactive Missions
Less known fact: the missions feature is built so that you can create a mission for a past time range. Intuitive? Not very. Useful? Extremely so, if you have a specific time range to check afterwards.
For example, some of our customers use the missions feature retroactively by opening Logmore Web when they receive a shipment from their partners, scanning the QR tag included and creating a mission for it. The starting and ending times for the mission are retrieved from the official paperwork that that comes with the shipment. If anything that fits the alert parameters set by the organization has happened, the alerts are triggered without a delay and the employee sees the complete reporting for the shipping process effortlessly. Since it is a waste of time and resources to test a potentially spoilt sample, the employee saves those resources for that sample.
Did you enjoy this post on the Logmore Feature, missions? In the next post of the series, we'll discuss another pioneering Logmore feature. In the meantime, check out our other blog posts and keep an eye on our social media channels. See you next week!
If you want to learn more about Logmore services, you can book a meeting or get to know Logmore Web on your own. After all, it costs you nothing to test the demo account!
.png)


